Wednesday, July 31, 2013

Fried Goat Cheese Salad with Pear and Arugula

I believe in a well-rounded diet.

Fried goat cheese is round. A pear is also kinda sorta round.

So today I'm sharing with you a favorite salad of mine, based on a fried goat cheese salad I had at Bacchus in Richmond's fan area.


To start, freeze goat cheese for 15 minutes. This will make slicing it easier and won't affect the taste! While that's happening, assemble the troops:


What's great about this recipe is that you probably already have the breadcrumbs, eggs, and flour in your kitchen. So once the cheese is frozen, slice it up into pieces about 1/4-1/2 inch thick. I used dental floss to easily cut through the cheese, but had to reshape it a bit at the bottom.

PS - more tips for frying goat cheese at the bottom of the post.


Dredge the cheese into flour, then eggs, then breadcrumbs, making sure it gets evenly coated at each step.


Oops, missed a spot...soon after this picture I realized I needed two hands to keep going and then put down the camera...

Next, fry the cheese (I love saying these words together) in hot oil that just barely coats the bottom of a non-stick pan, until golden brown on each side. To test if the oil is hot enough, I usually will dip a tiny corner of whatever I'm frying into the oil - if it sizzles immediately, it's ready. If not, it needs more time to heat up.


Is there anything more beautiful? I mean, I'm sure there is - but it's hard to think of something while you're staring at that, isn't it?

Toss the arugula with fig balsamic vinegar, olive oil, and pear. The sweet fig flavor compliments the peppery arugula. Top it with the fried goat cheese and enjoy your rich, well-"rounded" meal. :o)


Up next...fried brie?


Fried Goat Cheese Salad with Pear and Arugula
serves three; yields about 8 pieces of fried goat cheese, depending on how thick you cut the cheese

For fried goat cheese

  • 16 oz. goat cheese log (plan or herb flavored)
  • 1 cup Italian or panko breadcrumbs
  • 2 eggs, beaten
  • 1/2 cup of flour
  • olive oil
  • Fig balsamic vinegar
  • If using panko breadcrumbs, you'll need the following for seasoning. If not -- ignore!
  • 2 tsp. dried parsley
  • 1 tsp. dried thyme
  • 1/2 tsp. garlic powder
  • 1/2 tsp. ground black pepper
  • pinch of kosher salt

For salad

  • 4-5 cups arugula or arugula-blend lettuce
  • 1 medium pear, cubed
  • Lawry's Seasoned Salt and black pepper, to taste

1. Freeze goat cheese for 15 minutes. While freezing, prepare dredging station with three small bowls. Beat two eggs in a bowl. Set aside. 

2. Pour 1 cup bread crumbs into another bowl. Set aside. If using panko breadcrumbs: add the parsley, thyme, granulated garlic, ground black pepper, and kosher salt and stir to combine. Italian breadcrumbs are already seasoned.

3. Pour 1/2 cup of flour into a final bowl. Set aside. Line a sheet pan or plate with wax or parchment paper.

4. Remove goat cheese from freezer and unwrap. Slice into 1/4-1/2 inch pieces.

5. Put the cheese round into flour, then egg, then panko breadcrumbs. Flip cheese in each bowl to coat on both sides. Put the coated cheese round on your lined pan or plate.

6. Put a little olive oil in a nonstick pan, enough to coat the bottom. Set it on the stove over medium-high heat (you want it hot, but not smoking). When the oil shimmers, drop in 3-4 cheese rounds, depending on the size of the pan. Do not overcrowd.

7. Set the cheese down gently in the hot oil. It should start to bubble around the edges immediately. Keep an eye on your cheese, as it cooks fast. When the cheese is brown on one side, flip it over carefully with a spatula or use tongs.

8. Remove from the oil and place on the parchment paper. While cooling, dress arugula and cubed pear with fig balsamic vinegar and olive oil to taste. Top with warm, fried goat cheese.


Tips for frying goat cheese:

  • To make the cheese easier to slice, freeze for about 15 minutes to firm it up before cutting into rounds.
  • Use a sharp, non-serrated knife to cut. Be sure to rinse with warm water and wipe it down with a paper towel between slices. Goat cheese is sticky.
  • Try cutting it cheese-shop style, with a piece of clean stainless steel wire—or unflavored dental floss.
  • The cheese may crumble a little as or after you slice. Just smush it into a rough, round shape and keep going.

Friday, July 26, 2013

River City Rafting

I'm not the most outdoorsy person, one could say. Last month for Brian's birthday I got him a pretty unique gift - a rafting trip! Half of the present was me paying for it, and the other half was me physically getting in the raft. I wasn't sure if it was going to happen, but it did and it was worth it! Thankfully we had a great guide in our boat. His completely red, sunburned body was a welcomed sign that he's usually out on the river all day, every day (aka, experienced).

There are a few rafting companies in this city of ours, but we went with River City Rafting and would definitely recommend it! Our river boasts a few class IV and V rapids on a normal day, and we happened to go after a few days of steady rain, so almost every rapid we went over was at least a class III! The river was very high - higher than 10 feet if I remember. We put in at Pony Pasture and a few hours later, we ended up down by Rocketts Landing. I love a good history lesson and it was cool that we were learning fun facts about the city along the way. Did you know the old Braves Indian is sitting atop the Lucky Strike building, facing the water? And during the world wars, Lucky Strike employees would walk boxes of cigarettes down to Rocketts Landing, where boats were waiting to take them out to sailors at sea. Neat stuff.

They even let us stop on patch of rocks for water and delicious Kirkland brand trail mix that almost made Brian and I set up a membership at Costco on the spot.

Below are some pictures of our fun adventure that our friend Mike was kind enough to share. It was a totally unique way to see the river we've spent the better part of our lives loving. Check it out if you have a free weekend soon!


Wednesday, July 24, 2013

Bananas Foster Waffles

I think I'm in need of a summer playlist. I didn't even know what Blurred Lines was until a few weeks ago (embarrassing). I listen to the same mix of 43 songs on my iPod - some new, some old, and some classics, like Jack Johnson's Banana Pancakes. Its one of my favorite songs ever - the lyrics just speak to me: lazily sleeping in on a rainy day and making a delicious breakfast. That's pretty much the story of my life, rain or shine.

So after the 7,000th time hearing the song over the last few weeks, I figured I might as well take Jack's advice. Except that I'm partial to waffles over pancakes, so I made Bananas Foster Waffles.


This recipes uses maple syrup instead of the traditional brown sugar used for Bananas Foster, since I was pairing it with waffles. But you could try it with both or one or the other. I also used vanilla extract, dark rum, butter, and cinnamon. The sauteed bananas are poured over waffles, topped whipped cream and dusted with cinnamon to produce a pretty sweet breakfast dish.


I made the waffles first, and kept them warm in the oven at 200 degrees F until the topping was ready. A perfect Sunday morning breakfast!


Bananas Foster Waffles

  • 3-4 bananas, peeled and cut diagonally into slices 1/2 inch thick
  • 4 tablespoons (1/2 stick) unsalted butter
  • 3/4 cup maple syrup
  • 3/4 tsp. ground cinnamon
  • 2 tablespoons dark rum 
  • 1 tablespoon brown sugar (optional)
  • 1 teaspoon vanilla bean paste or extract
  • 6-8 Belgian waffles (I'm being transparent here. I use Bisquick. Sorry I'm not sorry I find it great. Use whatever waffle recipe you'd like!)

1. Cook waffles according to directions.

2. In a large sauté pan over medium heat, melt the butter with the maple syrup over medium heat. Stir in the cinnamon, rum and vanilla and simmer for 1 minute.

3. Add the bananas to the pan and cook for 2 to 3 minutes. Using a slotted spoon, transfer the bananas to a serving plate. Pour the maple syrup mixture into a sauceboat. Serve immediately with waffles and whipped cream. Serves 4.

Tuesday, July 23, 2013

Five Things You Need to Throw a Killer Murder Mystery Party

The heat is brutal, the humidity is unwavering, the mosquitoes, beetles and bugs are out in full force. It's officially late summer in Virginia. Is anyone ready for fall?

Yeah, I'm not either. I love summer too much, except for those pesky mosquitoes. If you're itching to throw a really cool party before the season ends, check out the guest post below on how to host a murder mystery party, courtesy of Tiny Prints!


It seems lately that murder mystery parties are all the rage, whether they are thrown as birthday soirees, New Year’s Eve gatherings, or random get-togethers. Professional murder mystery performances can be attended at a theater, but you are able to get much more involved when such a party is held in someone’s home with a smaller crowd of no more than twenty guests or players. They’re fun and can be relatively inexpensive to host, depending on how elaborate you want to be. If you are going to throw a murder mystery party of your own, you will need the following five things.

Friends who like to have fun: Murder mysteries are highly interactive, so the more your guests get into their assigned character roles, the more fun everyone will have. Send out customized invitations with the party information at least 4-6 weeks in advance. Ask your guests to RSVP so you know how many guests to prepare for. In addition, RSVPing allows you to send people their characters once they commit to coming. If they know the role they are playing, they can dress the part. Nothing’s more fun than a group of guests dressed to the hilt and pretending to be other people all night. If your guests are not up for a night of mystery and aren’t willing to let loose, it will be a lot more difficult to make it through the game successfully.

A good script: The script dictates the entire flow of the evening, as well as character details and plot. Whether you purchase your script or write your own, be sure it contains a varied character list – in other words, the cast of characters is fresh and interesting – several murder suspects, secrets, and plot twists. After all, guests want to be surprised at the turn of events, which should be revealed slowly throughout the evening. In addition, with a good script, clues should lead to a logical conclusion about the identity of the villain, which is the goal.

Creativity: To throw a great murder mystery party, you must be able to think outside the box. Whatever theme you choose for your party – whether it be set at a hotel in Mexico, the opera, or a wedding – be sure the costumes, décor, and food match your choice. Also, have a good prize for the guest who guesses the villain correctly to encourage guests to be as creative and involved as possible.

A killer menu: What’s a murder mystery party without a delicious buffet of themed foods? If you’re hosting a party that takes place in a specific state or country, serve food appropriate to that region – for example, gumbo if it takes place in New Orleans, or mini deep-dish pizzas if it’s Chicago. No matter the location, you can also create fun names for the foods and desserts you serve, such as Death by Chocolate Cake, Red Death Cocktail, Killer Kebabs, or Mystery Meat.

Confidence: Throwing any type of party presents its challenges and takes some work – from creating a guest list and sending invitations to figuring out a location, where to get enough chairs, and what food to serve – but murder mystery parties take an extra dose of confidence. Not only do you take care of all the normal party details, you also have to keep the game moving along all night. Keeping people on track and proceeding through the game with a confident attitude will calm confusion and allow people to have more fun overall.

Make sure each of these things is present at your murder mystery party and you’ll have a hit on your hands. Remember to also send personalized thank you cards after the party so guests know how you appreciate them playing along and doing their part to make the evening a success. So dive in to planning mode and prepare a killer murder mystery party sure to keep people talking for weeks.

Author Bio: Cindy Rollins is a seasoned writer and guest author who enjoys sharing products, services and ideas that combine thoughtful design with a functional purpose.

Friday, July 19, 2013

Easy BBQ Baby Back Ribs

When I hear the words "baby back ribs," that catchy 90's Chili's jingle starts playing in my head immediately. Never fails. And it usually remains there for the remainder of the day. I've never eaten Chili's baby back ribs, but if they taste as good as the song sounds, I think I'd love 'em.

Like many other foods, making ribs at home seemed intimidating to me - how does one buy ribs? Does Kroger carry them or do I have to go to a butcher shop? Is there a butcher shop in Richmond? Do I need to smoke them? Too many daunting questions.

However, I was recently introduced to a very simple and delicious baby back ribs recipe that I had to share with y'all - before anyone gets to the breaking point of summer grilling...you know, when you just can't force down another burger.


This is a simple recipe that would be easy to serve to a big group as it requires little work! Combine kosher salt, dry mustard, paprika, cayenne pepper, and black pepper in a small bowl.


Place each rack of ribs on a double layer of foil and sprinkle the rub all over.


Make it rain. 

And wrap 'em up.


Bake at 350, about 2 hours for baby backs and 3 hours for spareribs. Don't ask me what the difference is between them. Your house will smell ahmahzing.


Carefully unwrap ribs and let them cool completely. Pour any juices from the foil into a measuring cup, adding chicken broth, if needed, to measure 1½ cups. 

Whisk in that Sweet Baby Ray's, or whatever barbecue sauce you have, to blend.


Cover and set aside in the fridge.

Turn your gas grill on high. We balance the heat by brushing with Sweet Baby Ray's BBQ sauce, whisked with the juices from the oven. Turn the ribs frequently until charred in places and heated through, 7-10 minutes. 


Fall off the bone tender with the right amount of sweetness and spice!


Now, I want my baby back back baby back.


Easy BBQ Baby Back Ribs

  • 2 tablespoons kosher salt
  • 1 tablespoon dry mustard
  • 1 tablespoon paprika
  • ½ teaspoon cayenne pepper
  • ½ teaspoon freshly ground black pepper
  • 8 pounds baby back pork ribs (8 racks) or St. Louis-style spareribs (4 racks) 
  • Low-salt chicken broth (optional)
  • 1½ cups store-bought or homemade barbecue sauce plus more

1. Preheat oven to 350 degrees. Combine first 5 ingredients in a small bowl. Place each rack of ribs on a double layer of foil; sprinkle rub all over ribs. Wrap racks individually and divide between 2 baking sheets.

2. Bake ribs until very tender but not falling apart, about 2 hours for baby backs and 3 hours for spareribs. Carefully unwrap ribs; pour any juices from foil into a 4- cup heatproof measuring cup; reserve juices. Let ribs cool completely.

3. Build a medium-hot fire in a charcoal grill, or heat a gas grill to high. Add broth or water to rib juices, if needed, to measure 1-1½ cups. Whisk in barbecue sauce to blend.

4. Grill ribs, basting with barbecue sauce mixture and turning frequently, until lacquered and charred in places and heated through, 7-10 minutes. Transfer to a cutting board; cut between ribs to separate. Transfer to a platter and serve with additional barbecue sauce.

Note: Ribs can be baked up to 3 days ahead (the flavor will be more developed, and the cold ribs will hold together better on the grill as they heat through). Cover and chill juices. Rewrap ribs in foil and chill.

Thursday, July 18, 2013

Crisp Cucumber Salsa

I love the taste combination of "hot" and "cool" - spicy Mexican food with cool sour cream, warm grilled chicken on a cool salad, and so on. When my dad gave me a ton of cucumbers from his garden, I wondered what on Earth to do with them.

I already put some on sandwiches, wraps and salads for a nice crunch, but I still legitimately had three more cucumbers to eat and needed a way to use a lot at once, so I decided to make this cucumber salsa recipe. The crunchy cucumbers are coated in cool sour cream (woah there...) and the zippy jalapeños really bring the heat. Match made in heaven, during this heat wave.

Oh, and it's pretty healthy and gluten-free and all that. Until you add in the tortilla chips. And until you realized, you've eaten the whole bowl.


Crisp Cucumber Salsa

  • 2 cups finely chopped, seeded, and peeled cucumber (I like cucumber skin, so I only peeled half)
  • ½ cup finely chopped seeded tomato
  • ⅓ cup chopped red onion
  • 1 tablespoon minced fresh parsley (optional)
  • 1 jalapeño pepper, seeded and finely chopped
  • 4-5 teaspoons minced fresh cilantro
  • 1 garlic clove, minced
  • ¼ cup sour cream (make it generous)
  • 1 ½ teaspoons lemon juice
  • 1 ½ teaspoons lime juice
  • ¼ teaspoon ground cumin
  • ¼ teaspoon garlic powder
  • ¼ teaspoon Lawry's seasoned salt
  • Tortilla chips or scoops, for serving

1. In a small bowl, combine the first seven ingredients. In another bowl, combine the sour cream, lemon juice, lime juice, cumin and seasoned salt. 

2. Pour over cucumber mixture and toss gently to coat. Serve immediately with chips. 

Note: Wear disposable gloves when cutting hot peppers; the oils can burn skin. Avoid touching your face. Trust me, it ain't fun.

Friday, July 12, 2013

Sonny's Stuffed Chicken

Happy Friday! Today I'm excited to share a guest post with y'all from the creative/IT/branding/everything else team behind this little blog...the one and only Brian "Sonny" Swann.


As Emma's husband, I have been lucky to reap the rewards of this blog.  All the delicious goodness that is made in our kitchen is taste-tested, approved, and devoured by me.  But our story didn't start this way.  When I first took Emma out to a fancy restaurant in 2004, she ordered a hamburger.  Not even a cheeseburger - a hamburger.  The second fancy restaurant I took her to served her chicken fingers off the children's menu.  It took a while for her palette to develop, and it has since surpassed my own.

I'm laid up in bed this week after a bout with appendicitis (maybe it's the morphine, but I can't stop thinking about that Sister Sister episode), so I thought I'd pass the time and share with you one of my personal classic dishes - one that got Emma interested in all the magic that can be created in the kitchen.  It's easy, it's cheesy, it's chickeny.  It's Sonny's Stuffed Chicken.  (I'm Sonny).

P.S. - They don't let you keep it anymore.  Also - what is Elton John waiting for?  He's had appendicitis for weeks and is still forgoing surgery for several more weeks?

Speaking of useless, exploding organs - who's hungry?!


To start, combine and mix spinach, crumbled Feta, and tomatoes in small mixing bowl. You can use fresh spinach or frozen - we've tried both and enjoyed both. For this recipe, we buy the Feta that is seasoned with basil and other Mediterranean herbs. It should be in your grocery store. Once that's mixed, set aside. Then, like we did here, carefully slice pouch into sides of each breast.

Place the meat in a lightly greased glass baking pan, coating it with thin layer of extra virgin olive oil. With a spoon or your fingers, whichever floats your boat, stuff the cheese mixture you just made inside pouches in each breast. Sprinkle the top with salt, pepper, garlic powder, and thyme to taste. 

Then, top each breast liberally with rosemary and any extra cheese mixture.  Place a little toothpick through the breast to secure the stuffing.


Chicken stuffed with cheese is just better than regular chicken. So it's gonna take a little bit longer to bake. Bake at 350 degrees for 35 minutes or until golden brown. Check it is cooked all the way through before eating.


 Now ^ that ^ is one stuffed bird. Hope y'all enjoy Sonny's specialty! 


Sonny's Stuffed Chicken

  • 2 boneless, skinless chicken breasts (about 1 pound)
  • Extra virgin olive oil
  • Salt and pepper to taste
  • 1 teaspoon garlic powder
  • 1 teaspoon dried thyme
  • 4 sprigs fresh rosemary, leaves stripped

Stuffing:
  • 1 (4 ounce) package Athenos Tomato and Basil Crumbled Feta Cheese
  • ½ - 1 cup cherry tomatoes, halved
  • 1 cup spinach, chopped

1.  Preheat oven to 350 degrees. Combine and mix spinach, Feta, and tomatoes in small mixing bowl. Set aside.

2.  Carefully slice pouch into sides of each breast. Place in lightly greased glass baking pan. Coat chicken with thin layer of extra virgin olive oil.

3.  Stuff cheese mixture inside pouches in each breast. Sprinkle with salt, pepper, garlic powder, and thyme to taste. Top each breast liberally with rosemary and any extra cheese mixture.  Place a toothpick through the breast to secure the stuffing.

4.  Bake for 35 minutes or until golden brown. Check it is cooked all the way through before eating as stuffed chicken sometimes cooks slowly. 

Wednesday, July 10, 2013

Shrimp & Chicken Fusilli in a Rosé Sauce

I've recently started watching The Sopranos (I know, what took me so long?) and I feel the Italian coming out in me. Ok, that's not entirely true...I'm not Italian at all (German and Native American, and probably a host of others). But Brian is Italian, and I do feel like it's been a while since I've shared a good pasta recipe (or should I say, recipes).

This is one of my favorite favorites. I adapted this recipe from Zeppoli's in Blacksburg and sorta smushed it together with the The Pioneer Woman's Tomato Cream Sauce recipe. It combines light shrimp and chicken breast, curly fusilli pasta, and a creamy tomato rosé sauce. A rosé sauce for pasta is one of the easiest and most scrumptious sauces you can make. Topped with fresh basil, this is a simple decadent meal that will provide you with bountiful leftovers. It might even compare to Carmela Soprano's baked ziti, but I'll let you be the judge of that. Definitely don't tell Tony if you like mine better...


Here's a tip I learned for re-heating cream sauces so that you don't end up with a separated mess: reheat it gently in the microwave on low to medium power for 20-30 second intervals until hot - if it gets too hot too fast, the liquids will separate. Add a tablespoon or two of milk to the pasta before heating up. Stir occasionally to ensure all the pasta gets coverage with the milk.

To make this recipe your own, try adding slices of mushroom, chunky tomatoes, broccoli, etc. It's perfect for a yummy Sunday family supper and easy to double the recipe to serve at a large group event. Enjoy!


Shrimp & Chicken in Rosé Sauce

  • 2 tablespoons extra virgin olive oil
  • 2 tablespoons butter
  • 1 whole medium yellow onion, diced
  • 4 cloves garlic, minced
  • 1 jar marinara or tomato sauce
  • 1 cup San Marzano crushed tomatoes
  • Salt and pepper to taste
  • 1 cup heavy cream
  • Grated Parmesan or Romano cheese to taste
  • Chopped fresh basil
  • 1 pound Fusilli or other spiral pasta
  • 12 large fresh shrimp, peeled, tails removed, and deveined
  • 2 large chicken breasts
  • Poultry seasoning, salt, ground black pepper

1.  Sauté shrimp in 1 tablespoon of butter for 4-6 minutes, or until they turn a pink color. Add salt and pepper to taste.

2.  Separately, season chicken breasts with olive oil, poultry seasoning, salt, and pepper to taste. Bake the chicken at 350 degrees for 30 minutes, or pan sear for 7-9 minutes on each side, or until cooked through. Once the chicken is cooked, cut into strips and cubes. Set aside.

3.  Cook pasta according to package directions. Drain, reserving 1 cup of pasta water.

4.  Heat butter and oil over medium heat. Add onions and garlic and sauté for 3 minutes.  Pour in tomato sauce and crushed tomatoes. Add salt and pepper to taste. Stir and cook over low heat for 20 minutes, stirring occasionally.

5.  Stir in cream and cook for additional 3-5 minutes, stirring to combine. Add cheese to taste, then check seasonings. Combine pasta, sauce, shrimp, chicken, and chopped basil and serve immediately.  Thin with pasta water before adding basil if needed (but probably not needed).

Friday, July 5, 2013

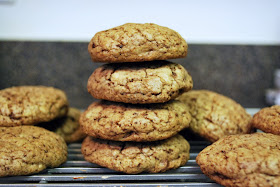
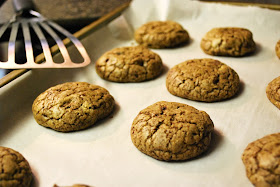
Milk & Cookies Bakery Classic Chocolate Chip Cookies

Who has a favorite chocolate chip cookie recipe? Every now and then I like to venture away from my trusted, fool proof Nestle Tollhouse recipe. It makes amazing cookies time and time again, and I often get  requests for my cookies for holiday/family events. I can't help but tell them -- in all honesty -- its just the recipe from the back of the chocolate chips bag.

But while living in New York, we were wandering around Greenwich Village one evening looking for something sweet (the story of our lives) and came across Milk & Cookies Bakery on Commerce Street. We took four cookies home from this adorable little tucked away shop -- chocolate chip, M&M sugar, oatmeal raisin, and peanut butter -- and devoured each one. Lucky for us, the recipe for their chocolate chip cookies are online. We stumbled across that and decided to attempt to recreate the magic. Because a good chocolate chip cookie and a tall glass of milk is magical, isn't it?


How cute is this place? If you're in NYC, make a stop here for dessert and if you aren't, add it to your to-do list for your next visit!


Milk & Cookies Bakery Classic Chocolate Chip Cookies
makes about 3 dozen cookies

  • Vanilla Base Dough (recipe follows)
  • 2 cups (12 ounces) semisweet chocolate chunks
  • 2 cups (4 ounces) bittersweet chocolate curls or shavings

VANILLA BASE DOUGH:

  • 2 1/2 cups (7 1/2 ounces) old-fashioned rolled oats
  • 2 cups (8 ounces) all-purpose flour
  • 1 teaspoon baking powder
  • 1 teaspoon baking soda
  • 1/2 teaspoon salt
  • 1 1/2 cups (12 ounces) unsalted butter, at room temperature
  • 1 cup (7 ounces) granulated sugar
  • 1 cup (7 ounces) light brown sugar
  • 2 large eggs, at room temperature
  • 1/2 tablespoon pure vanilla extract

Directions

1. Preheat the oven to 350 degrees F.

2. Line two baking sheets with parchment paper. (Alternatively, use nonstick baking sheets or lightly butter conventional baking sheets.) Set aside.

3. Place the oats in the bowl of a food processor fitted with the metal blade and process until finely ground. Transfer the ground oats to a mixing bowl. Stir in the flour, baking powder, baking soda, and salt. Set aside.

3. Place the butter in the bowl of a standing electric mixer fitted with the paddle. Begin beating on low speed to soften. Increase the speed to medium and beat for about 3 minutes, or until light and creamy. You may also use a hand-mixer if a standing electric mixer isn't available.

4. With the motor running, gradually add the granulated sugar and then the brown sugar, beating until very light and creamy.

5. Add the eggs, one at a time, and beat to incorporate, scraping down the sides of the bowl with a rubber spatula after each addition. Beat in the vanilla and when blended, slowly beat in the reserved dry mixture.

6. Stir in the chocolate chips and chocolate shavings or curls. While the dough is still streaky, remove the bowl from the mixer and scrape the paddle clean.

7. Lightly flour a clean, flat work surface.

8. **If necessary** Scrape the dough onto the lightly floured surface. Lightly flour your hands and finish mixing the dough by using a light kneading motion, working until the dough is just blended. Do not overwork the dough, you just want to be certain that all of the ingredients are just blended together.

9. Using a tablespoon or small ice-cream scoop, make mounds of dough. Roll the dough into balls about 1 1/2 inches in diameter. Place the balls, about 2 inches apart, on the prepared baking sheets. Using your palm, gently flatten each ball to make a puck-like shape about 2 inches in diameter.

10. When all of the cookies are formed, place in the oven and bake for about 15 minutes, or until lightly browned around the edges and set in the center. Do not over bake; you want some chewiness in the center.

11. Remove from the oven and, using a metal spatula, transfer the cookies to wire racks to cool.

Store, airtight, at room temperature for up to a week.

Note: Dough can be stored, airtight, in the refrigerator for up to a week or in the freezer for up to a month.

Wednesday, July 3, 2013

Old Bay Grilled Corn

If you've already made the big Independence Day grocery store trip, I'm sure you included corn in your food haul. If you didn't, I'm sure that after this recipe you'll be heading back to the store to make this Old Bay Grilled Corn.


Roasted, charred corn is a summertime classic; I love both the look and taste of it. Rachael Ray gave me the easy tip that the corn can be placed directly on the grill (preferably on an upper rack). It picks up a smoky yet sweet flavor from the grill.

I always like to make deals when cooking - so, if you shuck the corn, ask one of the men to man the grill. Just make sure he has a cold beer close by.

Brush the corn cobs lightly with olive oil and place directly on the grill, turning occasionally, until the corn is tender and just getting charred, 12 to 15 minutes. You do need to be careful because it can burn and dry out easily, so be sure turn often.


You'll then want to get the corn off the cob, in kernel form. If you've ever cut the kernels off by simply holding it over a bowl, you probably know that the corn cob can slip from its position and the kernels goes flying all over the place. Not pretty or fun to clean up.

To solve this, you can remove corn kernels from the cob using a bundt pan! Stand the corn cob upright, with the tip of cob placed in the center hole of the bundt pan. Holding the cob steady, use a sharp knife and make long downward strokes on the cob, separating the kernels from the cob. They'll fall right into the pan and won't leave you with a huge mess of kernels all over your counter.


^^ whodathunkit? ^^

Add the corn to a large bowl and season with plenty of butter, garlic powder, black pepper, salt, and Old Bay. Mix together and add more to taste. We grilled 10 corn cobs and it made enough to feed around 14 people.


Wishing you a happy and healthy Fourth!


Old Bay Grilled Corn

  • 6-10 corn cobs, shucked and de-husked
  • Olive oil for coating
  • Old Bay Seasoning, black pepper, salt, and garlic powder to taste

1. De-husk and shuck ears of corn.

2. Preheat a grill or grill pan to medium-high. Brush corn cobs lightly with olive oil and place directly on the grill, turning occasionally, until the corn is tender and just getting charred, 12 to 15 minutes. The kernels will brighten in color and then caramelize. When you see golden brown spots, it’s probably done.

3. Remove the corn from the grill and the corn cob upright, with the tip of cob placed in the center hole of the bundt pan. Holding the cob steady, use a sharp knife and make long downward strokes on the cob, separating the kernels from the cob. Complete this step for all cobs.

4. Transfer corn to a separate medium size bowl and season with butter, garlic powder, salt, black pepper, and Old Bay Seasoning.