Wednesday, December 10, 2014

When Life Hands You Lemons…Make Limoncello!


Today on Bevy we're featuring a special guest post from my mother-in-law, Sue Vick, who shares how to make homemade Limoncello. It's surprisingly easy, 100% delicious, and makes for a perfect holiday gift!

After weeks of waiting, the Limoncello is ready! 

Limoncello is a lemon liqueur that originated in Southern Italy more than a century ago. Limoncello is traditionally served chilled as an aperitif or an after-dinner digestivo. Along the Amalfi Coast, it is usually served in small ceramic glasses that are also chilled. I first enjoyed Limoncello in earnest a few years ago while on a fabulous trip to the Amalfi Coast. Lemons grow in abundance in the region and the local shops are filled with displays of the golden liqueur. The “liquid gold” was always offered at the end of our delicious meals. We always accepted. 

 
Limoncello gets its flavor and distinctive, almost neon-yellow color from the infusion of the lemon skins in pure alcohol. I have seen various recipes that call for Everclear or grain alcohol, but as neither is legally sold in Virginia I opted for Smirnoff 100 proof vodka. 

Admittedly, the very best Limoncello is made in Italy because they have the very best lemons. But, you can make excellent Limoncello at home. Why do it? Because it is easy to make and many commercial Limoncellos are too sweet. It turns out all you need to make truly incredible Limoncello are some good lemons, a bottle of stiff vodka, and just a little patience. 

When you make your own, you can use the best citrus available and control the sugar to your taste - a good reason to experiment with different recipes and different batches. And while it is traditionally a drink enjoyed during the heat of the summer, it is also a nice little gift to share with friends and family at Christmas. 

Homemade Limoncello

  • 6 1/3 cups or 1.5 liter vodka 
  • 15 lemons
  • 5 cups water
  • 4 cups of sugar

To make the Limoncello: This recipe occurs in 2 different stages: first the macerating of the lemon peels in alcohol, and then the actual brewing or mellowing with the sugar syrup.

First stage:

Wash and dry the lemons. If you can, use organic lemons as they are free of pesticides and wax. Peel the lemons, making sure to only separate the yellow part of the peel from the fruit, and not go too deep. Take care to avoid the white pith as it will add a bitter taste to the Limoncello. This is best accomplished with a sharp vegetable peeler, but you can also use a Microplane grater made especially for zesting citrus. I used a combination of the two tools. Save the zested/peeled lemons for another use (salad dressing, marinade or lemonade!)


Place the peels in a large glass jar and add the vodka. Seal tightly and store in a cool dark place for 10 days to two weeks. Some recipes recommend steeping for as long as 40 days. Basically, the longer the better. I placed my jars in a cabinet in the basement for 12 days. This steeping period is necessary for the essence of the lemon oil to seep into the alcohol. You can shake the jar occasionally, but resist the urge to open up the jar. The liquid will become bright yellow and very aromatic.


Second stage:

After macerating for two weeks, the alcohol is now ready to be drained and mixed with the water and sugar.


Combine the sugar and water in a saucepan over medium heat and stir until the sugar is completely dissolved and the syrup just comes to a boil. Some recipes call for filtered or distilled water, but I used good old Richmond, Virginia tap water. Remove the simple syrup from heat and let cool. I don’t like my Limoncello too sweet, so by all means experiment with the simple syrup and make it to your liking. 

Drain the lemon peel infusion from the jars through a moistened cheesecloth or coffee filter into a clean jar. Discard the peels. Repeat if necessary. Mix in the cooled sugar water with the drained liquid.


Now, for the second time, you have to exercise control and patience. Close and seal your jars tightly and let the liquid mellow for another two weeks to one month in the same cool dry place. Additional aging will result in a smoother marriage of flavors. Again, the longer the better.

Using a funnel, pour the liqueur into sterilized bottles. You can order bottles and personalized labels on-line.


Serve chilled. Salut, e cento anni!

Monday, December 8, 2014

Pumpkin Scones with Maple Cinnamon Butter


Although most of the leaves have fallen from the trees by now (tear), I'm still working frivolously to achieve my not-so-lofty goal of consuming as many pumpkin flavored things as possible before the season ends.

Luckily, I can easily achieve my goal, especially when I have: 

1) a solid two weeks left before the winter solstice
2) 8 pumpkin scones freshly baked with maple cinnamon butter sitting in my kitchen

Forget all those dry, crumbly scones you've begrudgingly eaten in the past. These are soft and chewy with a crisp crust; when you slather them with maple cinnamon butter, they make you forget that the polar vortex is on its way again.

At first, I was not sure I'd be able to pull these off (since I'm not the best baker in the world). They ended up being kind of fun to make and pretty simple, too. Once the dough is made, it's transferred to a lightly floured surface and patted into a 1½”-thick disk. 


The disk is cut into 8 wedges and doused in buttermilk — which soaks into the scones, giving them the soft center. Top with raw sugar for an extra sweet crunch.


The maple cinnamon butter is so simple a snowman could do it. Speaking of, do you want to build one? Or ride our bikes around the halls? Or mix butter, maple syrup, cinnamon, and salt together in a small bowl? If you're on board with the Frozen references, the butter is to the scones what Anna is to Elsa — necessary.


So as you're preparing your holiday menus, I hope these make the nice list. Even the naughtiest holiday houseguest in the world would want these for brunch. 


Pumpkin Scones with Cinnamon Butter

Scones:
  • ½ cup granulated sugar
  • 2 teaspoons baking powder
  • 1 teaspoon ground ginger
  • ½ teaspoon freshly grated nutmeg
  • ¾ teaspoon ground cinnamon
  • ½ teaspoon kosher salt
  • ¼ teaspoon ground cloves
  • ¼ teaspoon baking soda
  • 2 cups all-purpose flour, plus more for surface
  • ¾ cup (1½ sticks) chilled unsalted butter
  • ½ cup chopped fresh (or frozen, thawed) cranberries OR pecans (optional)
  • 1 large egg
  • ½ cup canned pure pumpkin
  • ¼ cup buttermilk, plus more for brushing
  • 2 tablespoons raw sugar
  • 1 cup pecans, chopped

Cinnamon Butter:
  • ¼ cup (½ stick) unsalted butter, room temperature
  • 1 teaspoon pure maple syrup
  • ¾ teaspoon ground cinnamon
  • ¼ teaspoon kosher salt

1. Mix butter, maple syrup, cinnamon, and salt in a small bowl.*

2. Whisk granulated sugar, baking powder, ginger, nutmeg, cinnamon, salt, cloves, baking soda, and 2 cups flour in a large bowl. Using the large holes on a box grater, grate in butter, tossing to coat in dry ingredients as you go; toss in cranberries or pecans, if using. Mix in egg, pumpkin, and ¼ cup buttermilk.

3. Transfer dough to a lightly floured surface and pat into a 1½”-thick disk. Cut into 8 wedges; transfer to a parchment-lined baking sheet. Freeze until firm, 25 minutes.

4. Preheat oven to 400F. Brush scones with buttermilk and sprinkle with raw sugar. Bake until golden brown, 25–30 minutes. Serve with cinnamon butter. Wrap any leftovers airtight, and store at room temperature. Reheat very briefly in the microwave, if desired.

*DO AHEAD: Cinnamon butter can be made 4 days ahead. Cover with foil or wrap and chill.

Wednesday, December 3, 2014

Grilled Steak Salad with Roasted Beets

'Tis the season for waistline expansion. I'm already feeling my motivation to exercise dwindling fast and my desire for hot comfort food increasing faster. Bring on the chili, sauces, and soups.

One way we continue to keep both warm and healthy in the late autumn/early winter months is by serving up hot salads. It's not the lettuce that's hot (obviously) — it's the toppings. One of my favorites combines fresh-off-the-grill, peppered, juicy steak with earthy, oven-roasted beets.


As with roasted broccoli, I could honestly eat an entire pan of sweet, roasted beets. When they're seasoned with thyme, salt, and pepper, I just find them irresistible! They're satisfying but light and the perfect addition to a fall salad.

So the beets are great, but what about the meat? A thin strip steak works best for salads in my opinion; it doesn't require a lot of fussing to make it taste great. We seasoned it here with only Kosher salt and ground peppercorns before firing it up on the grill.

What are some of your healthy winter food favorites?


Steak Salad with Roasted Beets

  • 4 cups lettuce of choice
  • 1 can of cut beets
  • 1/4 cup extra virgin olive oil
  • 1 tablespoon fresh thyme leaves, minced
  • 2 teaspoons kosher salt
  • 1 teaspoon freshly ground black pepper
  • Balsamic vinegar and extra virgin olive oil to taste, for dressing
  • 1/2 avocado, diced
  • Crumbled goat cheese
  • Cherry tomatoes
  • 2 boneless strip steaks, grilled
  • Lawry's Seasoned Salt and ground black pepper
1. Preheat the oven to 400 degrees. Open the can of beets; in a medium bowl, toss to combine with olive oil, thyme, salt, and pepper.

2. Place the beets on a sheet pan lined with aluminum foil. Roast for 35 to 45 minutes, turning once or twice with a spatula, until the beets are tender. Remove from pan and allow to cool for 5 minutes.

3. In a large bowl, toss beets with lettuce of choice (spinach, green mix, arugula) and cherry tomatoes. Season to taste with olive oil and balsamic vinegar. Add Lawry's Seasoned Salt and ground black pepper to taste, if desired.

4. Plate the salad and top with sliced avocado, crumbled goat cheese and grilled steak.

Thursday, November 20, 2014

Salted Caramel-Chocolate Pecan Pie

Food hybrids are all the rage. One delicious food mates with another delicious food and they have one really, really, ridiculously good tasting baby. Think: Cronuts (a croissant and a bagel). Quesarito (a burrito rolled in a quesadilla). And, the seasonally-appropriate Turducken (chicken stuffed in a duck stuffed in a turkey).

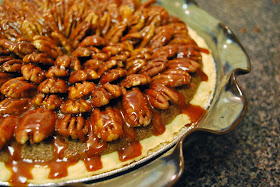
While most people probably won't spend hours cooking a Turducken next week, this tasty Salted Caramel-Chocolate Pecan Pie from Southern Living takes little time and is sure to mix things up at your Thanksgiving table. A cross between a fudge pie and pecan pie, this is just the kind of food hybrid that demands attention at the table. Those perfectly spiraled pecans don't hurt, either.


To make this pie the easy way, start with a frozen pie crust. If you're the Type A "everything-must-be-homemade" person on Thanksgiving, start by making your own pie crust. The chocolate filling comes next, which is fairly simple: sugar, butter, flour, unsweetened cocoa, corn syrup, vanilla extract, and eggs. Toasted chopped pecans are added right before it's baked to give the pie additional texture.


To arrange the pecans on the pie, start by making large circles around the outer edge of the pie. Continue working inwards, stacking the pecans on top of one another.


Now, you'll either need to make a Salted Caramel Topping or buy some from Trader Joe's. While I am most definitely not Type A, I did decide to home make it for this pie; caramel just seemed easier to make than crust.


Drizzled over the pecans, the Salted Caramel Topping is the final touch.


A pie we can all be thankful for this season.


Salted Caramel-Chocolate Pecan Pie


  • 2 cups toasted pecan halves
  • 1 (9-inch) unbaked deep-dish pie crust shell

Chocolate Filling Ingredients

  • 1 1/2 cups sugar
  • 3/4 cup butter, melted
  • 1/3 cup all-purpose flour
  • 1/3 cup 100% cacao unsweetened cocoa 
  • 1 tablespoon light corn syrup
  • 1 teaspoon vanilla extract 
  • 3 large eggs 
  • 1 cup toasted chopped pecans

Salted Caramel Topping Ingredients

  • 3/4 cup sugar
  • 1 tablespoon fresh lemon juice
  • 1/3 cup heavy cream
  • 4 tablespoons butter
  • 1/4 teaspoon table salt
  • 1/2 teaspoon sea salt

1. Prepare Chocolate Filling: Preheat oven to 350F. Stir together first 6 ingredients in a large bowl. Add eggs, stirring until well blended. Fold in chopped pecans. Pour mixture into unbaked deep-dish pie crust shell.

2. Bake at 350F for 35 minutes. Filling will be loose but will set as it cools. Remove from oven to a wire rack.

3. Prepare Salted Caramel Topping: Bring 3/4 cup sugar, 1 tablespoon lemon juice, and 1/4 cup water to a boil in a medium saucepan over high heat. Do not stir. Boil, swirling occasionally after sugar begins to change color, 8 minutes or until dark amber. Do not walk away from the pan, as the sugar could burn quickly once it begins to change color. Remove from heat; add cream and 4 tablespoons butter. Stir constantly until bubbling stops and butter is incorporated (about 1 minute). Stir in table salt.

4. Arrange pecan halves on pie. Top with warm caramel. Cool 15 minutes; sprinkle pie with sea salt.

Tuesday, November 18, 2014

Classic Apple Pie


Even though I haven't hosted Thanksgiving before, I like to be helpful to the host by bringing a dessert to share. I read something recently in Bon Appetit all about Thanksgiving etiquette. It was so elaborate that it was almost silly...

No scented candles! Roasting turkey and stuffing should be the only aromas.

Married and established couples should be split up. Consider placing newly formed couples opposite each other rather than side by side.

On no account should you ever consult Google to settle an argument; remember: a gentleman never resorts to fact.

There was a section in the issue about "suggested" desserts to serve. And, the interesting part was this: you don't have to have pumpkin pie on your Thanksgiving dessert table.

Say what? You're either thinking: I don't? But I love pumpkin pie; it's classic and a must. Or, you're all: Pumpkin isn't my family's thing; never has been, never will be - and you don't rock the orange pie this time of year.

It's a simple thought, often overlooked in the pumpkin-crazed world in which we live, but it's the truth. There are lots of seasonal desserts out there to choose from! If your heart isn't set on pumpkin this year but you feel at a loss for what to bake, I'm sharing two pie recipes this week in anticipation for next week's big meal.

First up is an all-American classic: Apple Pie.

Classic apple pie is homemade goodness at its very best. Apples are already a delicious snack alone, so you don't need me to tell you that they're best baked, in a caramel sauce, underneath flaky, golden crust, with a scoop of vanilla ice cream on the side.

Now my mouth is watering again...


This particular slice had just come out of the oven; I clearly couldn't wait very long to scoop it on my plate.

But before the above can happen, there's just a little bit of prep work that needs to be done. Apples must be sliced; caramel sauce must be made; and dough must be rolled.

This Apple Pie recipe calls for very thinly-sliced, peeled apples - cut to about ⅛-inch thick. It'll go by faster if someone peels, the other slices. Once finished, place the slices into a large bowl and mix with lemon juice (to prevent browning).

For the caramel sauce - which I wanted to chug directly from the pot - you'll need to gently melt butter in a saucepan at medium-low heat. Stir in flour to form a paste, then add white sugar, brown sugar, water, cinnamon, nutmeg, cornstarch, and vanilla. Bring all of that to a boil. Reduce temperature and simmer for about 5 minutes or once caramel coats the back of spoon.


The fruits of your labor!

Apple Pie

  • 1 9-inch double pie crust (recipe follows)
  • 6-8 Granny Smith apples—peeled, cored and sliced (about 3½-4 cups)
  • Juice of ½-1 lemon
  • ½ cup unsalted butter
  • 3 tablespoons all-purpose flour
  • ½ cup white sugar
  • ½ cup packed brown sugar
  • 3⅔ tablespoons water
  • 1 teaspoon cinnamon
  • ¼ teaspoon nutmeg
  • 1 tablespoon cornstarch
  • 1 teaspoon vanilla
  • Egg whites (to brush crust)

1. Peel, core, and very thinly slice the apples to about ⅛-inch thick slices. Place into a large bowl and mix with lemon juice (to prevent browning).

2. Melt butter in a sauce pan at medium-low heat. Stir in flour to form a paste. Add white sugar, brown sugar, water, cinnamon, nutmeg, cornstarch, and vanilla; bring to a boil. Reduce temperature, and simmer for 5 minutes or once caramel coats the back of spoon.

3. Preheat oven to 350 degrees. Meanwhile, place the bottom crust in a 9-inch glass pie pan and brush with egg whites to prevent it from becoming soggy. Place your pie on an aluminum-foil covered cookie sheet. 

4. Once butter mixture is caramelized, combine with apples, reserving ¼ of mixture.  Fill pie crust with apples, mounded slightly. Cover with a lattice work crust (or normal top crust if desired) and brush top with reserved butter mixture. Bake for one hour on the middle or bottom oven rack.

Note: If using a lattice crust, cut your slices before starting on the rest of the pie and save in refrigerator until ready.

Perfect Pie Crust

  • 1½ cup Crisco (vegetable shortening)
  • 3 cups all-purpose flour
  • 1 egg
  • 5 tablespoons cold water
  • 1 tablespoon white vinegar
  • 1 teaspoon Salt

1. In a large bowl, with a pastry cutter, gradually work the Crisco into the flour for about 3 or 4 minutes until it resembles a coarse meal. In a small bowl, beat an egg with a fork and then pour it into the flour/shortening mixture. Add 5 tablespoons of cold water, 1 tablespoon of white vinegar and 1 teaspoon of salt. Stir together gently until all of the ingredients are incorporated.

2. Separate the dough into thirds*. Form three evenly sized balls of dough and place each into separate large Ziploc bags. Using a rolling pin, slightly flatten each ball of dough (about ½ inch thick) to make rolling easier later. Seal the bags and place them in the freezer until you need them. (If you will be using it immediately it’s still a good idea to put in the freezer for about 15 to 20 minutes to chill.)

3. When you are ready to use the dough to make a crust, remove from the freezer and allow to thaw for 15 minutes. On a floured surface roll the dough, starting at the center and working your way out. (Sprinkle some flour over top of the dough if it’s a bit too moist.) If the dough is sticking to the countertop use a metal spatula and carefully scrape it up and flip it over and continue rolling until it’s about ½ inch larger in diameter than your pie pan.

4. With a spatula, lift the dough carefully from the surface of the counter into the pie pan. Gently press the dough against the corner of the pan. Go around the pie pan pinching and tucking the dough to make a clean edge.

Note: Separating it into thirds will result in three thin crusts. If you prefer a more substantial crust, separate it in half.

Thursday, November 6, 2014

Crispy Curried Chicken


What are the first things that come to mind when someone says "Indian food?" For me, it's: spicy, soupy, oily, rich, fatty, laborious, curry powder...curry powder...

While I'm not the biggest fan of Indian cuisine, I absolutely love spicing things up with curry powder. That probably makes no sense and you're thinking, "if she likes curry powder, she likes Indian food. Duh." But, everyone can be a little picky, right? While I like the spice that is curry powder, I'm not fully on board (yet) with traditional Indian dishes like chole bhature (A spiced, curried chickpea dish) or rogan josh (a lamb or goat curry).

Actually, if I'm being honest, I usually avoid it at all costs. Give me Mexican, Greek, Italian...literally any other regional type of food before Indian. But I recently tried a Crispy Curried Chicken recipe from one of my favorite blogs Crepes of Wrath. It's simple and delicious - just my style; chicken drumsticks and thighs are marinated in a spiced coconut milk mixture, then baked until perfection. I've been thinking about it naan stop since I first tried it.

First, combine the coconut milk, curry powder, turmeric, salt, ginger, cardamom, peppers, shallot, lime juice and lime zest in a bowl. All the colors!


Then, place the chicken pieces in a bag or large, shallow dish and pour the marinade over top. Refrigerate for an hour or two, or as long as overnight. I used a large glass baking pan and marinated, covered with aluminum foil, for about 2.5 hours.


Next, line a rimmed baking sheet with foil, then place a cooling rack inside the sheet. This helps the chicken stay dry and crispy. If you don't have a tray, it's fine to just put the chicken directly in the pan, but it won't be quite as crispy. And we love crispy chicken!


Put the chicken on the tray and then the tray in the oven; bake for 20 minutes. Remove the chicken and turn it on it's other side; bake for another 20 minutes. Flip the chicken a final time and bake for another 15-20 minutes, until crispy.


Yes and yesssss.

If by the third turn, your chicken isn't getting as crispy as you like, you can turn up the oven to 425F to speed things up. Lastly, top with torn cilantro leaves and sprinkle with sea salt.


Keep calm and curry on.


Crispy Curried Chicken

  • 10-12 chicken thighs and/or drumsticks, skin on
  • 1 14.5 ounce can coconut milk
  • 2 tablespoons curry powder
  • 1 tablespoon turmeric powder
  • 2 teaspoons kosher salt
  • 1 teaspoon ground ginger
  • ¼ teaspoon ground cardamom
  • 2-3 hot peppers, finely minced or sliced (I used 1 jalapeño, 1 serrano and 1 cherry pepper)
  • 1 shallot, finely minced
  • Juice of 1 lime
  • Zest of 1 lime
  • Cilantro, for garnish
  • Sea salt, for garnish

1. First, marinate your chicken for at least an hour or two. Combine your coconut milk, curry powder, turmeric, salt, ginger, cardamom, peppers, shallot, lime juice and lime zest in a bowl. Place your chicken pieces in a bag or large, shallow dish and pour the marinade over top. Refrigerate for an hour or two, or as long as overnight. The longer the better!

2. Preheat the oven to 400F. Line a rimmed baking sheet with foil, then place a cooling tray inside the pan, if you have one - this will help the chicken stay dry and, therefore, crispy. If you don't have a tray, it's fine to just put the chicken directly in the pan, but it won't be quite as crispy.

3. Line the chicken up on the tray, and bake for 20 minutes. Flip the chicken and bake for another 20 minute. Flip the chicken a final time and bake for another 15-20 minutes, until crispy. Turn the oven up to 425F for this final step if you want to speed things up a bit.

4. Once golden and crisp, remove from the oven, place in a bowl and garnish with cilantro and sea salt. Serve with a simple salad or some naan.

Wednesday, October 22, 2014

Risotto with Sausage, Mushrooms, & Mint

October 22 is always a special day for us - it's our wedding anniversary. Today, Brian and I celebrate three years of marriage (!). What's so special about year number three? Well, according to a study out of the UK, the third year marks the point when "couples begin to settle into a comfortable co-existence, having come to terms with each other's imperfections." Hmm...I guess you could call it that. :)

While we aren't planning on doing any of the traditional (leather) or modern (crystal) gifts for the third year, we are planning on getting a yummy meal out on the town. And how lucky are we that Richmond Restaurant Week falls over our anniversary? We'll be eating French fare at Bistro Bobette in Shockoe Slip tonight. We've never been and can't wait.

Speaking of Europe, when we were there last year for our anniversary, Brian ordered an amazing risotto dish in Rome - complete with sausage, mushroom, and mint. It was rich, savory, and perfect for a special occasion, so we recreated a couple nights ago as an "early" anniversary dinner. You can celebrate more than once, right?

Without further adieu, here's our Anniversary Risotto: a fancy, homemade meal fit for any married or unmarried couple, complete with Italian sausage, mushrooms, peas, and fresh mint.


The secret to making risotto is to cook it slowly, stirring frequently (pretend carpal tunnel is a good thing) and adding as much liquid as the rice requires. Try to have the ingredients prepped and ready in advance. If you've made risotto before, you know you need to devote your undivided attention to cooking the rice; and you also know that it'll be worth it.

In my opinion, the flavor is best when the risotto has been made carefully (and of course, with love), topped with cheese, and served directly from the stove. Do all of this, and you'll be very satisfied.


Yummm. Happy anniversary to us!

P.S. - there's more risotto here (but with lemon and seafood).


Risotto with Sausage, Mushrooms, & Mint

  • 6 cups low-sodium chicken stock 
  • 3 tablespoons unsalted butter 
  • 1 tablespoon extra virgin olive oil 
  • 1 yellow onion, finely chopped 
  • 1/2 lb. mild Italian sausage, ground 
  • 1/2 lb. white button mushrooms, brushed clean and sliced 
  • 2 cups medium-grain rice, such as Arborio
  • 1/2 cup dry white wine 
  • 1/2 cup shelled peas, frozen
  • Salt and freshly ground pepper, to taste 
  • 1/3 cup grated Parmigiano-Reggiano cheese
  • 2 tablespoons chopped fresh mint, plus more for garnish

1. Pour the stock into a saucepan and bring just to a simmer.

2. Separately, in a large saucepan or risotto pan over medium heat, melt 2 tablespoons of the butter with the olive oil. Add the onion and sauté until tender and translucent, about 5 minutes.

3. Add the sausage and cook, stirring frequently with a wooden spoon to break up the lumps, until lightly browned, about 5 minutes. 

4. Add the mushrooms and cook often, stirring, until just wilted, about 2 minutes. 

5. Add the rice and cook, stirring often, until the kernels are hot and coated with oil, about 2 minutes. 

6. Add the wine and continue to cook, stirring often, until the liquid is absorbed.

7. Add the stock from the saucepan 1/2 cup at a time, stirring constantly and making sure the liquid has been absorbed before adding more. When the rice is about half cooked, stir in the peas and season with salt and pepper. The risotto is done when the rice grains are creamy on the outside and firm yet tender to the bite, 20 to 25 minutes total.

8. Remove the risotto from the heat. Stir in the remaining 1 tablespoon butter and the cheese. Serve immediately.

Thursday, October 9, 2014

Pumpkin Buttermilk Pancakes

October is already off to a great start. We spent last Saturday and Sunday in gorgeous Charlottesville, where we were tasting wines and taking in views at Trump Winery and Blenheim Vineyards. I'd definitely recommend visiting both of these if you're in the Piedmont area - and in the mood for good wine!


October also means we, the people, now have permission to use pumpkin everywhere without restraint and without fear of being basic. Let's be honest, what else is there to do in the fall besides...pumpkin-ing everything? Yep, I'm using pumpkin as a verb here.

We've been pumpkin-ing these thick, delicious Buttermilk Pancakes before October arrived, but I wanted to wait until the official start of the season to share the recipe.

Adding real pumpkin puree and seasonal spices like cinnamon, nutmeg, ginger, and cloves to our standard Buttermilk Pancake recipe takes fall brunch to a whole new level. These are so easy that there's no need for Bisquick anymore. Top with chopped, toasted pecans for a hearty crunch!


Buttermilk Pancakes

  • 1¾ cups flour, sifted*
  • 1 teaspoon salt
  • 1 teaspoon baking soda
  • 2 cups buttermilk
  • 2 teaspoons sugar
  • 1½ teaspoons baking powder
  • 2 eggs, beaten
  • 2-4 tablespoons butter, melted

For Pumpkin Buttermilk Pancakes, add:

  • 1 cup pumpkin puree
  • 1 teaspoon ground cinnamon
  • ½ teaspoon ground nutmeg
  • ½ teaspoon ground ginger
  • ¼ teaspoon ground cloves
  • ¼ cup pecan pieces, toasted (optional, for topping)

1. Sift flour before measuring in a large mixing bowl. Then resift with sugar, salt, baking powder, and baking soda.

2. Mix eggs with buttermilk.

3. Combine dry ingredients with liquid ingredients, then add butter. Mix well, but with few strokes. Batter will be lumpy.

4. Cook on hot, greased griddle.

*If you don't have a sifter, you can use a strainer. If you don't have a strainer, you can also mix flour with a wire whisk or a fork. You won't get the flour quite as light as when sifting, but this will work to break up any clumps and fluff up the flour a bit.

Wednesday, October 1, 2014

Oktoberfest: Mini Bratwurst & Sauerkraut Balls

I know "Mini Bratwurst & Sauerkraut Balls" might sound completely weird and unappetizing, unless you happen to be a sauerkraut lover (which I'm guessing most of us are not). But, before you bypass this Oktoberfest sequel post, here me out!


Sauerkraut balls are a traditional favorite in the Midwest, thanks to the region's dense German heritage. These savory treats combine the fall's abundantly sour cabbage with the sweetness of the bratwurst.
Bratwurst is browned in a pan with onion and parsley before being mixed with milk, flour, and dry mustard. The mixture becomes dense and is easily shaped into balls before being covered in flour, egg, and finally, breadcrumbs. Freeze on a baking sheet for about 20-25 minutes to ensure they hold their shape well.

Even though the bratwurst is already cooked before these go in the oil to fry, try to size these a little smaller than golf balls - anything bigger could fry in the oil quickly without warming all the way through.


We halved the recipe; using about 3/4 pound of bratwurst, it made about 22 balls. The full recipe below would probably make between 45-50 - the perfect amount for an Oktoberfest party!


Mini Bratwurst & Sauerkraut Balls
makes 40-50

  • 1½ pounds pork bratwursts, ground ham, or corned beef (or mixture)
  • 2 pounds sauerkraut, squeezed and drained
  • 1 teaspoon dry mustard
  • 1 small onion
  • 1 pinch parsley
  • 2 cups flour
  • 2 cups of milk
  • Egg (for coating)
  • Unseasoned bread crumbs (for coating)
  • Vegetable oil (for frying)
  • Honey mustard, thousand island, or cocktail sauce (for dipping)

1. Remove casing from bratwursts. Brown meat, onion, and parsley in a medium skillet over medium-high heat.

2. Add flour, milk and mustard. Stir together until combined and fluffy. Transfer to a mixing bowl and allow to cool.

3. Add sauerkraut and mix again. Roll into balls (about the size of a golf ball or slightly smaller) then completely cover balls first in flour, then dip in egg, and finally roll in bread crumbs.

4. Freeze for 20-25 minutes on a baking sheet before frying until dark brown. Drain on paper towels and serve with dipping sauce of choice.

Monday, September 29, 2014

Oktoberfest: German Potato Salad


Even though the temperatures are still fairly warm here in Richmond, the autumn equinox is officially behind us. While we've begrudgingly moved on from tanlines and sandals, the world has already started celebrating its favorite fall festival: Oktoberfest. Even if you aren't one of the millions celebrating in Munich, you can still join in the fun with people all over the world who partake in this annual sausage fest.

Brian and I went to the recently-opened Metzger Bar and Butchery and picked up sausages for the occasion. Here's what we chose for our wurst platter:


  • Traditional Bratwurst (Metzger) - sausage made from pork in a natural casing
  • Nuremberg Sausage (Metzger) - smaller and thinner bratwurst, traditionally from the city of Nuremberg, with ground lamb added to increase fat content
  • Saturday Night (SausageCraft)- fine-ground pork flavored with garlic, local Hardywood Park beer, and lots of Siracha sauce
  • Kasekrainer (SausageCraft) - Austrian style sausage with pork, beef, Gruyere cheese and bacon

While I would have loved to have found authentic knockwurst or frankfurterseach sausage we had was different and equally delicious. Topped with Metzger's housemade red cabbage sauerkraut, the meat was perfection!

Meats aside, a good wurst platter wouldn't be complete without authentic German Potato Salad. This recipe comes from my Oma, the most German person I know. Potatoes are boiled, sliced thin, and mixed with mayonnaise, sour cream, and warm water - allowing it to maintain both the cider vinegar and sugar taste - ultimately making it an absolutely delicious pairing to the wurst.


Stay tuned for another Oktoberfest post this week!


German Potato Salad

  • 3 pounds small new potatoes
  • ½ cup onion, finely chopped
  • 1 teaspoon salt
  • 1 teaspoon pepper
  • 1 tablespoon sugar
  • ¼ cup extra virgin olive oil
  • 2-3 tablespoons Heinz cider vinegar
  • ½ cup water, warmed
  • 2 tablespoons Duke’s Mayonnaise
  • ¼ cup parsley, chopped
  • ½ cup sour cream (optional)

1. Place potatoes in a large pot of water. Bring potatoes to a boil for about 25 minutes or until fork can easily pierce the center.

2. Allow potatoes to cool, then cut into thin slices while still warm. Place slices in in a large bowl. Add onion, salt, pepper, sugar, oil, cider vinegar, and warm water. Toss gently.

3. Taste and add more cider vinegar if necessary. Add mayonnaise and sour cream, mix, and refrigerate.

4. Sprinkle with parsley, mix, and serve.

Thursday, September 25, 2014

Tomato & Goat Cheese Tart

Is baking "bready" sweets at home intimidating to you? I'll bake a few things here and there, but I'm certainly a novice when it comes to making things like muffins, scones, tarts, and pastries from scratch. I usually like to leave those up to the professionals.

However, I recently look a cooking class at Sur La Table on the basics of French cooking. One of the things we made was a Tomato & Goat Cheese Tart - a savory treat made of layered onions, tomatoes, an egg mixture, topped with goat cheese and baked in the oven.


So why am I not calling this Tomato & Goat Cheese Quiche, you ask? Quiches are actually in the "savory tart" food family (and what a lucky family to be in, might I add). But since this is made in a tart pan, and no one really cares about the overlap between "quiche" and "tart," let's just keep calling it tart.

The only slightly difficult part about the tart was the dough - either you have make your own (see above: not for me!) or use frozen pie dough. I used some from Trader Joe's that started to crack as it thawed. We had to roll with it - literally - and balled up the dough (which was supposed to thaw perfect and uncracked) and re-rolled it out on our own.

The onions, chopped and sauteed with lemon zest and fresh thyme, make the bottom layer. Then, thinly sliced Roma tomatoes are next. An egg/milk/sour cream mixture is poured over top and seeps into the nooks and crannies of the tart.

Then, the crumbled goat cheese brings it all together. I've made this with regular goat cheese and herbed goat cheese; both are delicious, but I recommend hand-crumbling the cheese (breaking if off a log) over buying packaged crumbled cheese.


This unassuming dish seems ordinary yet event worthy and is wonderful for any meal of the day. Serve with breakfast potatoes and a simple green salad for brunch or lunch. Serve alongside grilled chicken and asparagus for a simple dinner.


Tomato & Goat Cheese Tart
Special equipment: a 10-inch tart pan with a removable bottom

  • 1 frozen pastry/pie crust, or homemade 
  • 2 tablespoons olive oil
  • 1 small yellow onion, peeled and finely chopped
  • 1 medium garlic clove, peeled and minced
  • 2 teaspoon fresh thyme, minced
  • 2 teaspoons lemon zest
  • Kosher salt and freshly ground black pepper
  • 4 large eggs
  • 1/4 cup sour cream
  • 1/4 cup whole milk
  • 3 tablespoons minced basil, divided
  • 4 firm-ripe plum tomatoes (Roma tomatoes)
  • 3 ounces soft goat cheese

1. Preheat oven to 375 degrees and position an oven rack in the bottom third of the oven. Lightly butter a 10-inch tart pan with a removable bottom and set aside.

2. Place a large skillet on the stove over medium heat and add the oil. When the oil is shimmering, add the onions and cook until tender and almost caramelized, about 10 minutes. Add the garlic and cook until fragrant, about 1 minute. Stir in the thyme and lemon zest, taste and adjust seasoning with salt and pepper. Set aside to cool.

3. In a medium bowl, whisk to combine the eggs, sour cream, milk, 2 tablespoons basil, salt and pepper.

4. Spread the onion mixture over the bottom of the tart. Arrange the tomatoes in a single layer on the top of the onion mixture. Pour the filling over the top, sprinkle with goat cheese and transfer to the oven to bake until the edges are golden brown and the filling is set, 30-40 minutes. If the filling might appear watery around the tomatoes, check for doneness in another area.

5. Transfer the tart from the oven to a wire rack and allow to cool slightly. Remove the side of the tart pan by placing the pan on a can or a bowl and allowing the side to drop. Move the tart to a flat surface and slice into wedges. Garnish with remaining basil.